


 info@wisonflag.com


How to assemble a feather flag
Assemble your feather flag without extra tools in under 60 seconds. You complete a clear four-step assembly process: join poles, position base, attach banner, and adjust tensioning. Always inspect your essential display kit items before starting:
fiberglass pole segments
flag banner
base mount
bungee tension cord
This simple checklist guarantees complete readiness.
Key Takeaways
Connect the pole sections from thickest to thinnest and slide the graphic banner gently over the top.
Select a ground spike for soft soil or a weighted cross base for hard concrete surfaces.
Attach the bungee cord tightly to the base cleat to keep your flag smooth and stable.
Assembling the Feather Flag Pole and Banner
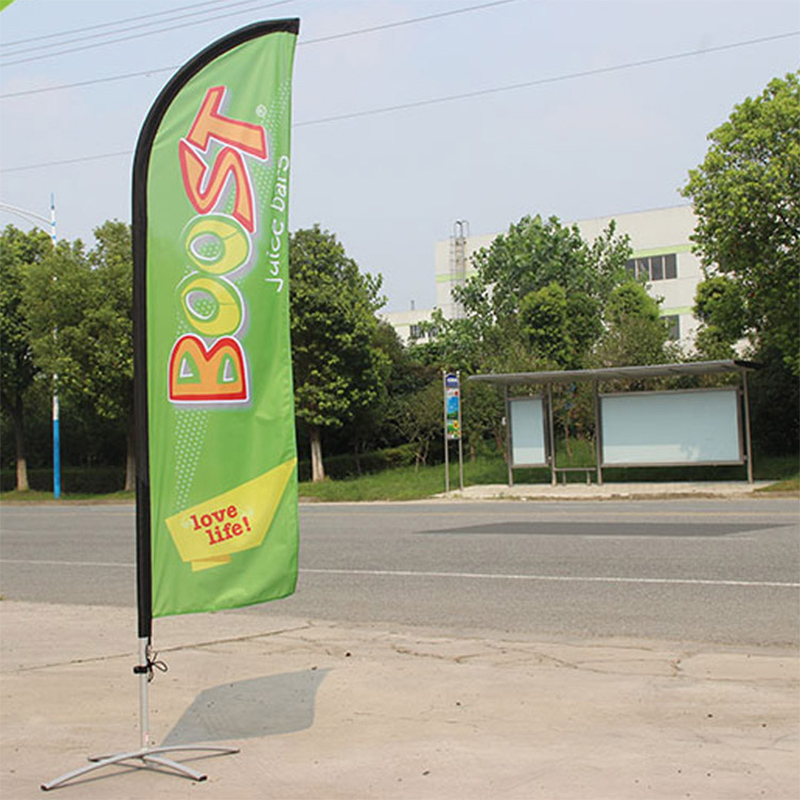
You can build your display quickly with the right approach. Proper connection ensures outstanding stability and strong visual impact. You will begin by joining individual pole sections together before sliding on your printed graphic banner.
Connecting Pole Segments
Organize your hardware on a flat surface first. Inspect each individual piece to identify the bottom base section and the thin top piece. You assemble the complete frame from bottom to top using this exact sequence:
Lay out the pole pieces on the ground in front of you. You will notice each section is tapered with one smaller end and one larger end.
Start with the thickest piece. This sturdy lower piece serves as your base section.
Connect the sections from thickest to thinnest. Insert the smaller end of the next piece into the larger end of the previous one and push until firmly seated.
Continue this process until you reach the thinnest, flexible "whip" piece. This bendable piece always goes on top.
Perform a final assembly check. The assembled pole should feel like one continuous, flexible rod.
Pay close attention to the tightness of every single joint. Secure connections prevent severe operational problems during outdoor usage.
The pole sections feature a tapered fit where one end slots neatly into the next piece.
You must push each segment until it seats firmly in place.
The finished structure must feel like one continuous, flexible rod.
A loose joint causes operational issues, so sections must stay fully seated.
Mounting the Flag Fabric
Now you can install the banner onto your frame easily. Handle the material carefully to preserve structural stitching along the edge. Your standard feather flag setup relies on a smooth slide to protect the graphic.
The bearing sleeve accepts flags with a standard sleeve diameter under 11/16 inches.
Hold the top tip of the fiberglass pole firmly with your hand. Find the open bottom edge of the sleeve on your printed banner. Guide the narrow tip into the sleeve pocket smoothly. Pull the fabric down along the frame using small, controlled motions. Do not force or snatch the material. Guide the flexible tip carefully through the top curved seam.
Remember: Push the pole slowly and carefully to avoid puncturing or tearing the feather flag material.
Once the fabric reaches the far end, check the top pocket thoroughly. The tip must sit securely inside the reinforced pocket area. Smooth out all visible wrinkles along the full sleeve length. Your banner now displays your message clearly and stands ready for final base mounting.
Securing Bases and Flag Tension

You must select appropriate mounting hardware to maintain full stability. Proper ground attachment supports the frame during changing weather conditions.
Choosing the Right Base
When paired with the right base (ground stake, cross base, or weighted base), feather flags remain stable and readable, even in changing weather.
Your setup environment determines the exact hardware you need. You match your display hardware directly to your setup surface:
Base Type | Suitable Surfaces | Key Characteristics |
|---|---|---|
Ground Spike Base | Grass, Soil, Sand, Dirt, Landscaped Areas | Ideal for soft outdoor surfaces; provides stability, especially in windier locations like roadsides and beaches. |
Cross Base | Concrete, Hard Surfaces, Indoor Areas (e.g., event halls, sidewalks) | Designed for flat, hard surfaces where a spike cannot be used; best for low-wind indoor/outdoor concrete. |
Square Base | Pavement, Storefronts, Trade Shows (Indoor/Outdoor) | Versatile for both indoor and outdoor use on hard surfaces; suitable for low-wind areas. |
Water/Donut Bag (Add-On) | Flat, Hard Surfaces (e.g., concrete, pavement) | Not a standalone base; adds extra ballast and stability to other bases in windy conditions. |
Driven stakes anchor securely into lawns, dirt, or landscaping spaces. Sand anchors feature a specialized helical spike designed to twist 20-46 cm (8-18 in) into loose ground. This deep engagement resists pull-out forces. A correctly placed anchor holds firm against lateral forces of approximately 7-16 kg (15-35 lb) in winds reaching 32-48 km/h (20-30 mph).
Hard flat surfaces require free-standing bases instead of ground spikes. You place a cross base or square base on concrete, pavement, or indoor display floors. Outdoor installations on hard ground require heavy add-on ballast to counteract wind. You can add an ET-Q36-15KGSWB model to supply 15 kg (approx. 33 lbs) of counterweight. Heavy-duty options like model ET-Q35-16KGWB provide 16 kg of water weight capacity for maximum stability.
Adjusting the Tension Cord
You complete your display assembly by applying correct tension to the fabric. Proper tensioning prevents graphic sagging and extends the overall life of your banner.
Mount your assembled fiberglass pole onto the base spindle securely.
Locate the reinforced fabric loop at the lower edge of the feather flag banner.
Attach your bungee cord or tension clip through the fabric loop.
Pull the cord downward toward the base cleat.
Fasten the cord tightly to the cleat screw to hold the fabric taut.
This secure connection maintains smooth graphic presentation without excess strain. The rotating spindle base allows your display to turn full 360 degrees freely with changing wind directions. Proper rotation reduces sudden wind resistance and prevents tipping hazards completely.
Perform a quick post-assembly safety inspection on your setup. Verify your feather flag spins freely 360 degrees to follow changing winds.
When taking down your display, collapse the poles from top to bottom systematically. Let the fabric dry completely before packing to prevent mold. Proper maintenance guarantees your feather flag stays bright for every event.
FAQ
How long does feather flag assembly take?
You can assemble your complete feather flag kit in under 60 seconds without using any extra tools.
What base should you use on concrete?
You should choose a cross base or square base for concrete surfaces. You can add a water bag for extra stability in high wind.
How do you clean and store the banner?
You wash the fabric banner with mild soap and water. You must allow the material to dry completely before folding it for storage.
Please Contact Us!
Recommended Products

Heavy-Duty Elastic Sleeve for Feather Flags | Anti-Tear Pole Pocket for Teardrop Banners

Custom Outdoor Double Sided Feather Flags- Personalized Outdoor Swooper Banner for Car Dealerships, Grand Openings, and Sidewalk Business Advertising

Custom Feather Flag with Pole and Stake - Personalized Outdoor Swooper Banner for Car Dealerships, Grand Openings, and Sidewalk Business Advertising


